This document is relevant only for the following hardware:
This tutorial will explain how to change the firmware running on the Arduino on board Mirobot. This could be to replace it with your own firmware which does something different or to update the firmware to the latest version for new features.
In order to communicate with the Arduino Pro Mini that’s on board Mirobot, you will need a serial converter. The most widely supported of these is from FTDI, but any should work. Some examples of suitable converters are:
It’s best to get a 3.3V version of these because it will also let you update the WiFi module on the V2 Mirobot if you need to. If you’re just reprogramming the Arduino you can use either a 5V or a 3.3V cable. If you’re looking for a much cheaper option then you should search for “CP2102 USB Serial” on eBay to find a converter for a few dollars, though there are so many variants of these that it’s difficult to recommend a specific one.
Make sure you’ve got the Arduino IDE installed on your computer. If you haven’t, download it and install it. You’ll need version 1.6 or greater.
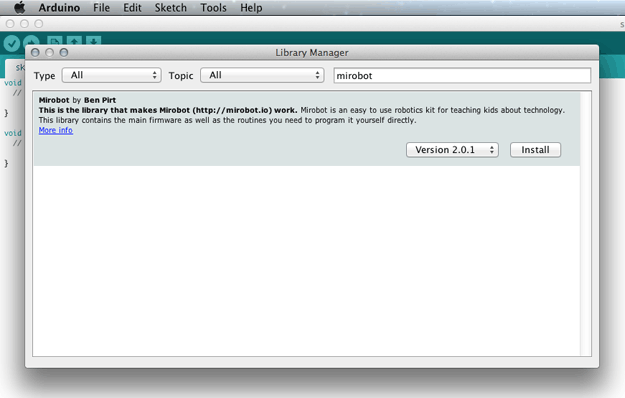
To install the Mirobot library you should:
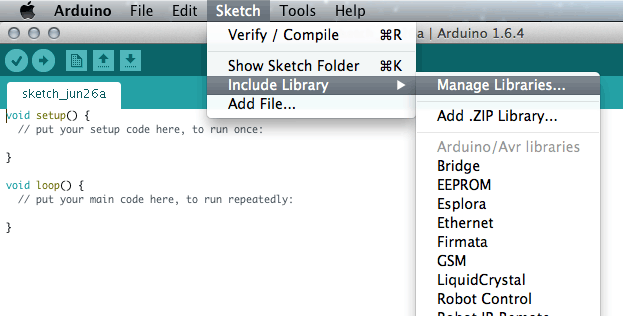
At the bottom of your File » Examples menu, you should have a menu item for Mirobot (if you haven’t, then the library is not installed properly).
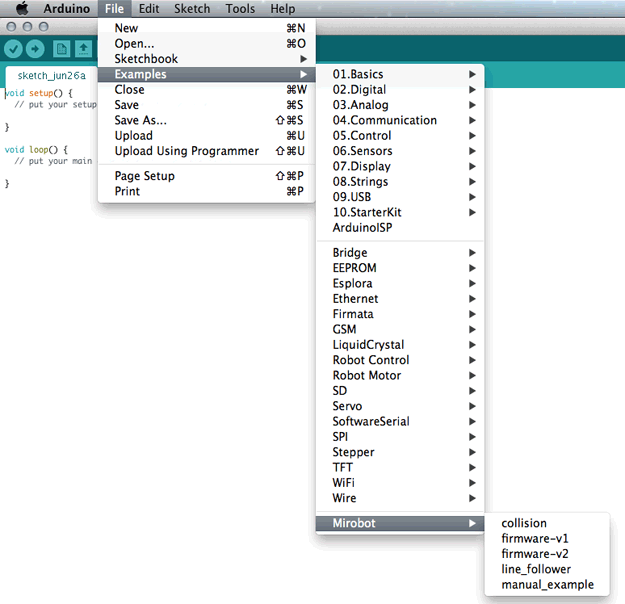
If you want to update the stock firmware on your Mirobot, then choose either the “firmware-v1” if you have the first version of Mirobot (bought prior to August 2015) or “firmware-v2” if you have the later version.
If you want to modify the firmware yourself, then you can choose one of the other sketches as an example and get started.


